
With recent shelter-in-place regulations being put into effect in an effort to slow the spread of COVID-19, attending in-person yoga classes is no longer an option. However, it is during these uneasy times that practicing yoga and meditation to release stiffness and anxiety is more essential than ever. Over the past few weeks not a day has gone by that I have not practiced yoga. More specifically, not a day has gone by (or will go by, to be completely honest) that I do not practice one—if not all—of my favorite hip-openers to release feelings of anxiety and worry.
Hip-opening poses not only benefit the body, allowing for a greater range of motion, but also release anxiety and stress-related emotions. Needless to say that during this disturbed time where a lot of us are most likely feeling a disruption in normal routine practicing hip-opening yoga poses is incredibly beneficial to not only realign the body but also realign the mind and refocus on health. So, without further ado, my four yoga-in-place hip-opening poses…
The Squat (Malasana)
I like to sneak a squat in as I am flowing from mountain pose to forward fold (tadasana to uttanasana) during Sun Salutation A. A relatively easy pose to flow into, the squat is a great transitional pose that can be used throughout a yoga sequence. For example, squatting and opening up the hips can help build balance and confidence while prepping for an advanced posture like crow pose.
How to get into the pose: Squat with your feet as close together as possible, toes facing slightly outward. (Keep your heels on the floor if you can or place them on folded mat for support.) Separate the thighs slightly wider than the torso. Exhale, lean the torso forward between the thighs. Press your elbows against your inner knees and bring the palms together in prayer. To deepen, press your inner thighs against the sides of your torso. Reach your arms forward, then swing them out to the sides and notch your shins into your armpits. Press your fingertips to the floor or reach around the outside of your ankles and clasp your back heels. Hold the position for 30 seconds to one minute, then inhale, straighten the knees, lift the tailbone to the sky for uttanasana.

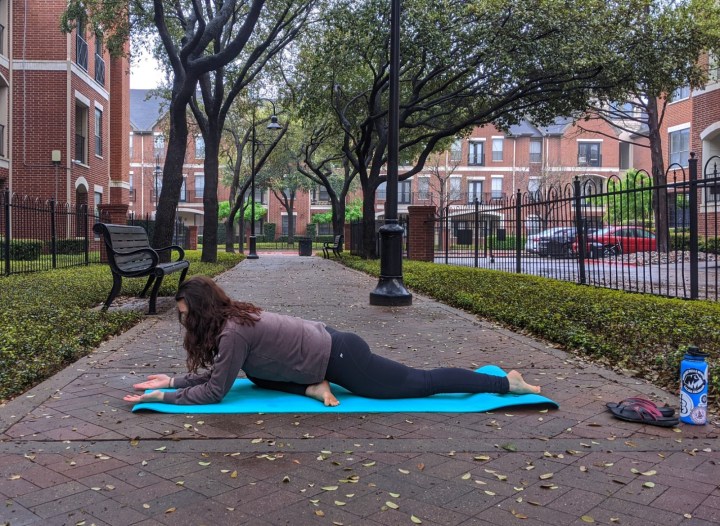
Pigeon Pose (Kapotasana)
A yoga practice staple, pigeon pose is in almost all of my yoga sequences because it is beginner-friendly and effective.
How to get into the pose: Begin in tabletop or downward facing dog. Bring your left knee to touch your left wrist. Keep the left thigh parallel to the side of your mat and inch your left foot forward until it is just in front of the right hip. Slide the right leg toward the back of the mat and lower both hips toward the floor. As you lower your pelvis, be sure that your hips don’t spill to the left. Extend the back leg long and square the hips to face the floor. Stay here, with your arms straight and your hands alongside your hips, for two to four breaths, until the hips have comfortably settled toward the floor. Now, walk your arms forward as far as is comfortable. Option: continue to deepen the posture by walking your arms forward until your forehead rests on the floor. Press the top of the foot of your extended leg into the mat to release any tension on the knee. Take three to four deep breaths, release, and repeat on the other side.
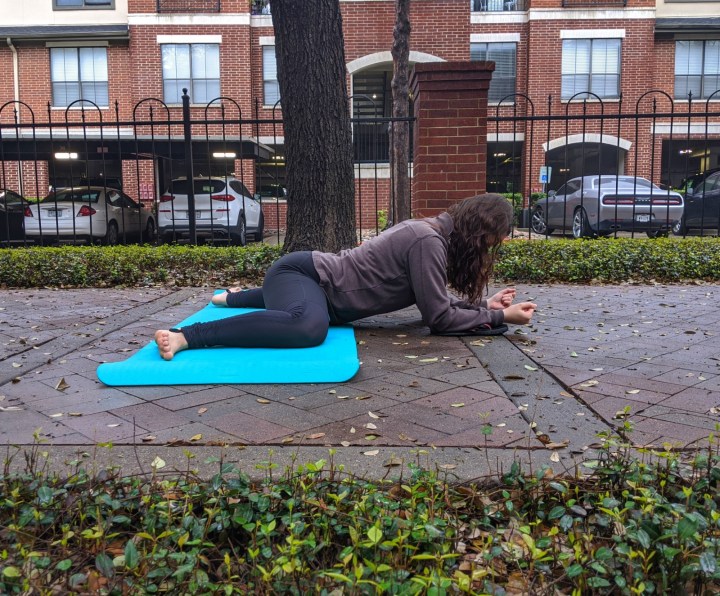
Frog Pose (Mandukasana)
An advanced hip-opener, frog pose is often practiced in yin classes and held for several minutes. I enjoy placing a bolster underneath of my upper body, letting my toes drift toward each other, and surrendering into the pose.
How to get into the pose: Begin in tabletop pose. Walk the knees out wider than the hips. Flex the feet—toes should face outward and heels should be directly behind the knees. Option: place additional padding (blanket or towel) under your knees if necessary. Walk the hands forward as far as is comfortable. Place forearms on a block or on the ground. Reach the crown of your head forward and your tailbone back. Keep hips in line with the knees. Lift the torso away from the ground. Hold for up to two minutes, then gently release into child’s pose. Note that if this pose is too difficult, recline into child’s pose until ready.
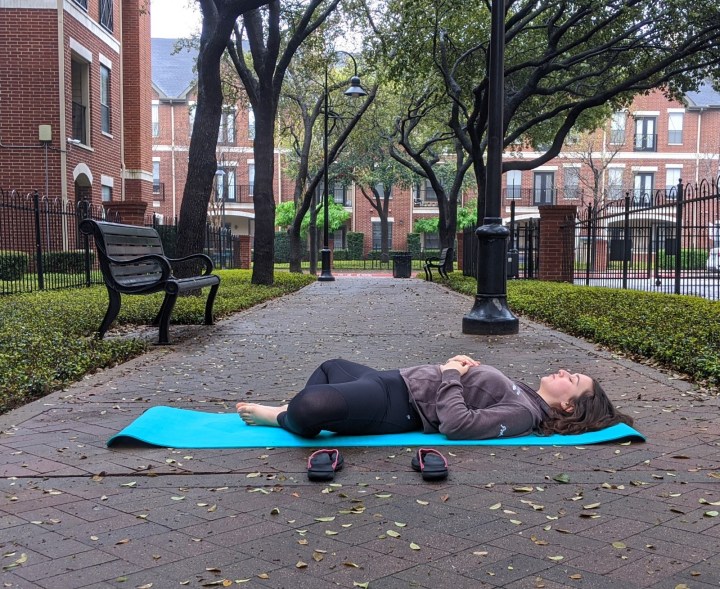
Reclined Bound Angle (Supta Baddha Konasana)
I often enjoy this restorative, subtle hip-opener instead of traditional savasana when rounding out my practice. Additionally, I frequently offer it to my students, beginning and advanced alike, explaining that if all else fails and your hips are too tight for any other pose, supta baddha konasana (as it is commonly referred to in yoga classes) can help gently open them up because gravity is doing all of the work.
How to get into the pose: Begin in bound angle pose with the heels as close to the pelvis as is comfortable and the soles of the feet pressing together. Modified option: begin with knees touching. Exhale, engage your core, and begin slowly lowering the lower back to the ground. Continue slowly rolling your back onto the floor, one vertebra at a time, supporting your head and neck on a rolled-up blanket, pillow, or bolster if necessary. Gently rotate the inner thighs out. Lay your arms on the floor, angled at about 45 degrees from the sides of your torso, palms up. Rather than pushing your knees into the ground, which can actually tighten the groin, let them float up toward the sky and continue settling your groin deep into the pelvis. As the groin drops toward the floor, so will the knees. To come out, press your thighs together, roll over onto one side and come into a comfortable fetal position.
Until next time,
Leah Pinkus
P.S. If you are in need of some yoga in your life, I offer a variety of virtual classes that during the next few weeks will be donation-based—donate your presence or $5–$20, sliding scale. Head to the contact page and shoot me a message if you are interested in scheduling a private yoga session!
